Does doing shiplap sound intimidating? Time consuming? It did for me to, until I found this DIY shiplap hack! It’s super easy and cheap! I mean like done in a few hours!
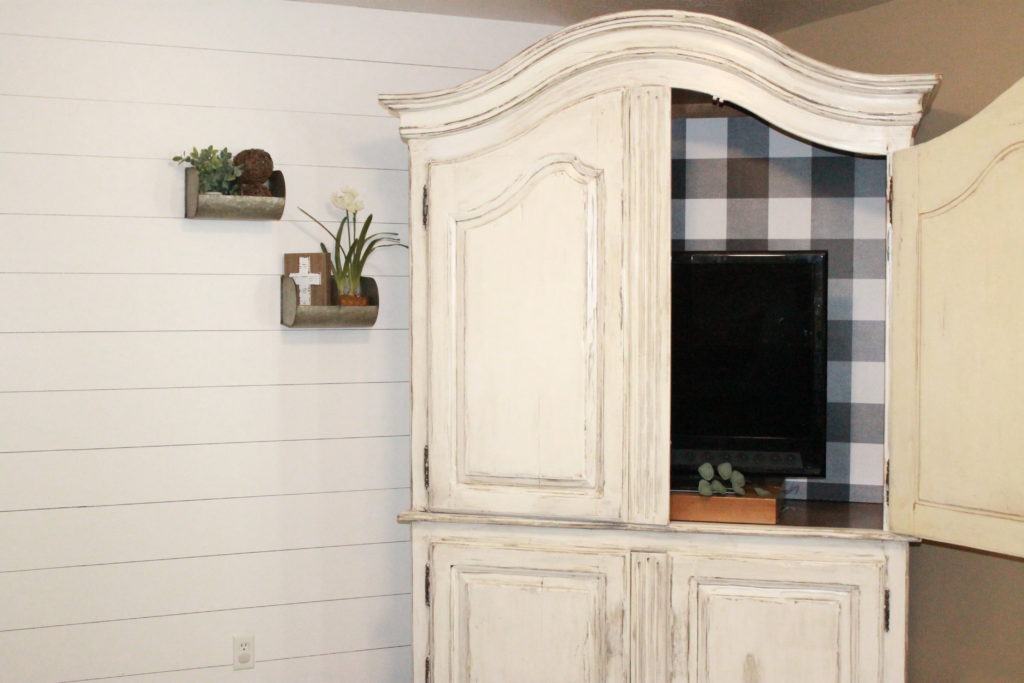
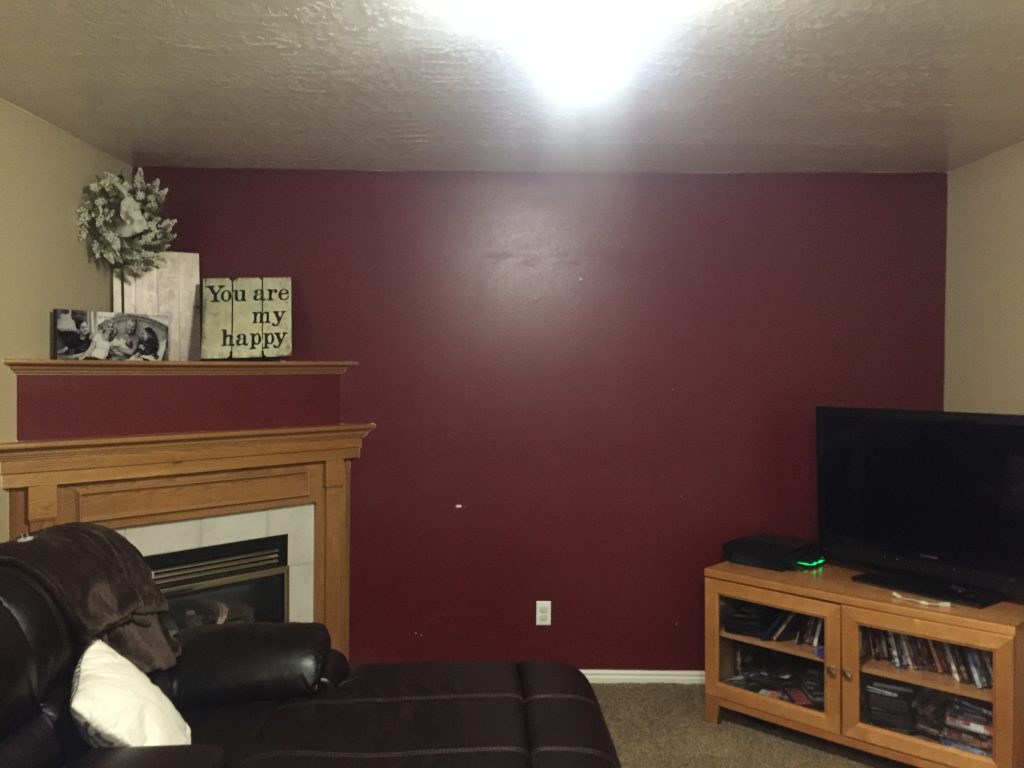
I’ve seen ALL of the Fixer Upper episodes multiple times. Sometimes, I turn on Fixer Upper on Hulu in the morning and leave the show on through the day for background noise. So OF COURSE I’m obsessed with shiplap! When we moved into our new home it was in great shape, it just needed some updating. One of those updates being a maroon wall in my main living room. Maroon is a color i would NEVER choose! It had to go fast! It was one of the first projects I got to work on right away. I had the wall redone the first month in our new home. Along with the maroon wall is the TV stand that was temporary and the fireplace that I was doing a makeover on at the same time as the shiplap wall. It was all driving me crazy, but it eventually all came together. You’ll see.

My Shiplap Method
I knew I wanted a light color to brighten the space so originally I was going to paint it white, but then I got researching shiplap. There are quite a few methods and it was a little overwhelming. I knew I didn’t want to install actual shiplap boards for two reasons. 1. I didn’t have time to cut and install boards for shiplap. 2. I didn’t want a bunch of holes in my wall in case I wanted to change this up one day. To help me narrow down my options I asked a Facebook group I’m part of (I don’t remember which one) for different methods and someone mentioned “sharpie shiplap”. At first I thought, NO WAY! I didn’t think it would look good at all. Draw with a sharpie on my wall!?!? I dismissed the comment for a week or so as I continued to research. I read lots of reviews on wallpaper that weren’t great, like different rolls of wallpaper can be completely different in color. I also read that shiplap wall paper can have a hard time lining up when switching rolls. For wallpaper that I felt like I could trust it was more than I was willing to pay. It made me very nervous to move forward with wallpaper. That option was out.
My only option left was sharpie shiplap, because I WANTED a shiplap wall! I decided to look a little deeper into sharpie shiplap. I found this post from the Must Have Mom blog. I’m glad I found her post because if I hadn’t found her I would have drawn my sharpie lines with an actual sharpie. Also linked in her post was a post for the Sharpie Shiplap done by Shelby Brock @ouridahofarmhouse. It’s amazing! Go follow these guys and check out their work! So many good ideas!
DO NOT USE AN ACTUAL SHARPIE!
Use an oil based Sharpie Paint Marker. I didn’t even know these Sharpie Paint Markers existed. Luckily I was able to find one at Joann’s. Below is the supply list that I used.
Supplies
- KILZ Primer (2 coats, maroon is HARD to cover) I’m a huge fan of KILZ. You can use a primer that you prefer, if needed.
- Valspar, Satin, Color: Swiss Coffee
- Oil Based Sharpie Paint Marker, Medium Point, Color: black
- 4 ft. level to draw lines
- pencil
I started by painting my wall with two coats of KILZ primer. I started painting at 10:00 at night. Face palm. My teenager got off work at midnight this particular night and this is what I decided to do to keep myself awake! I also put a coat of primer over the wood on my fireplace. I HATE this color of wood and there’s a lot in my new house. It’s very 90’s style so there is a lot of painting in my future.

Next, i used a white latex paint that i had already. After one coat of this i decided it was too light. Because of this my project ended up taking longer than i wanted. To avoid my mistake, heed my advice, buy a paint that is a suggested shiplap color. Search Pinterest!
I called around to paint stores to see if they had colors i was looking for and i priced them out. I’m really not a paint snob so i went with the best price, Valspar from Lowes in the color Swiss Coffee. I really wanted a more bright white, just not stark white and this was a perfect color.
After two coats of paint i marked my lines for shiplap with pencil. Its up to you if you want to do this step. It made me feel more comfortable. I marked every 7” as the post from “Must Have Mom” did, but you can choose the spacing tgat you like.
Next i grabbed my sharpie marker, i was srill skeptical! I just kept telling myself I could paint over it if I didn’t like it! First I tested it on paper to get a feel for it. I figured tge paint marker would be much like a chalk pen and it was. If you press too hard it will bleed. Then I lined up my level slightly below my pencil lines and started drawing with my sharpie. So nervous!
After my third line was drawn I was able to get a good look at my wall and loved it! I was able to do my entire wall with one marker. I was so thrilled with the end result!
It took me two days to finish my lines because I have a baby that only takes naps that are thirty minutes long! So I had to draw a line here and there when he wasn’t “helping”. But for those without busy toddlers it should only take about an hour or so, depending on the size of your wall, to draw your lines.
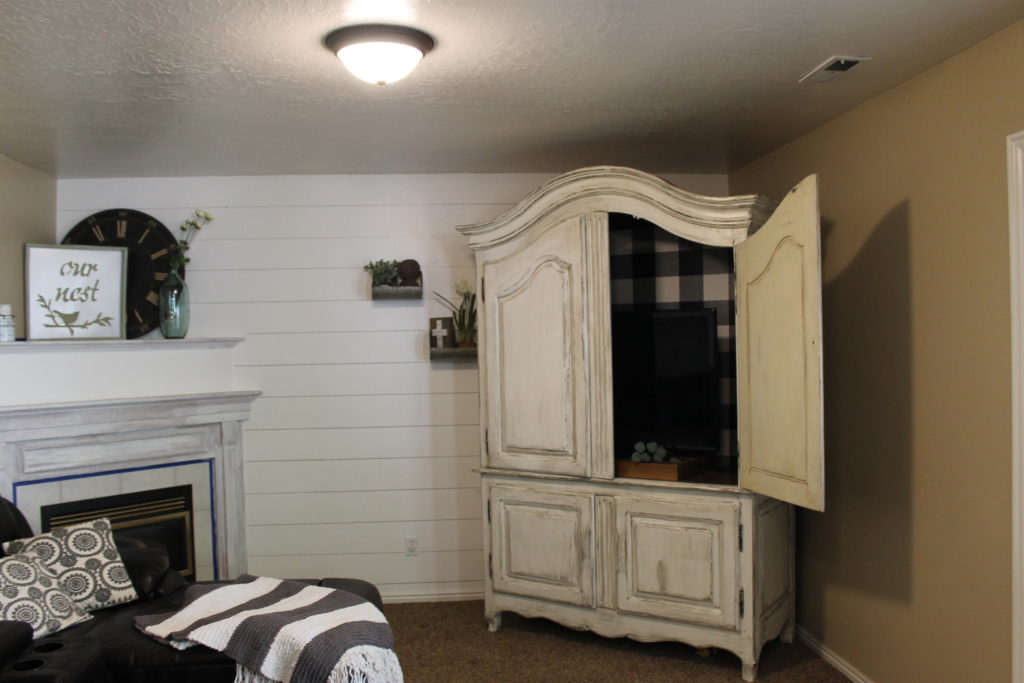
Hi Natalie, I found your blog thru the blog traffic challenge and was intrigued. I love this faux shiplap project! It looks great! I also recently saw shiplap wallpaper that looked promising. Anyway, I also have an armoire very similar to yours. I’m currently using mine as a coffee bar/station in my smallish kitchen. I love the plaid that you put on the back of yours. I’m assuming that’s wallpaper? I was just looking at some different peel and stick wallpapers for the back of mine. Great stuff!
This is so cute! I love this idea. Plus super easy to paint over it in the future when you want to change it up. Looks so good.
Agreed! And much easier than actual shiplap!
This is genius! I am still in an apartment, but I am definitely pinning this for when we finally get into a house 🙂
Great! It’s so easy on the wallet!
Wow! What a transformation! I love shiplap, too. I will keep this clever tip in mind when I build my house in Tennessee.
Awesome! Thanks for visiting!
What a great idea and it looks wonderful!
Thanks my dear!