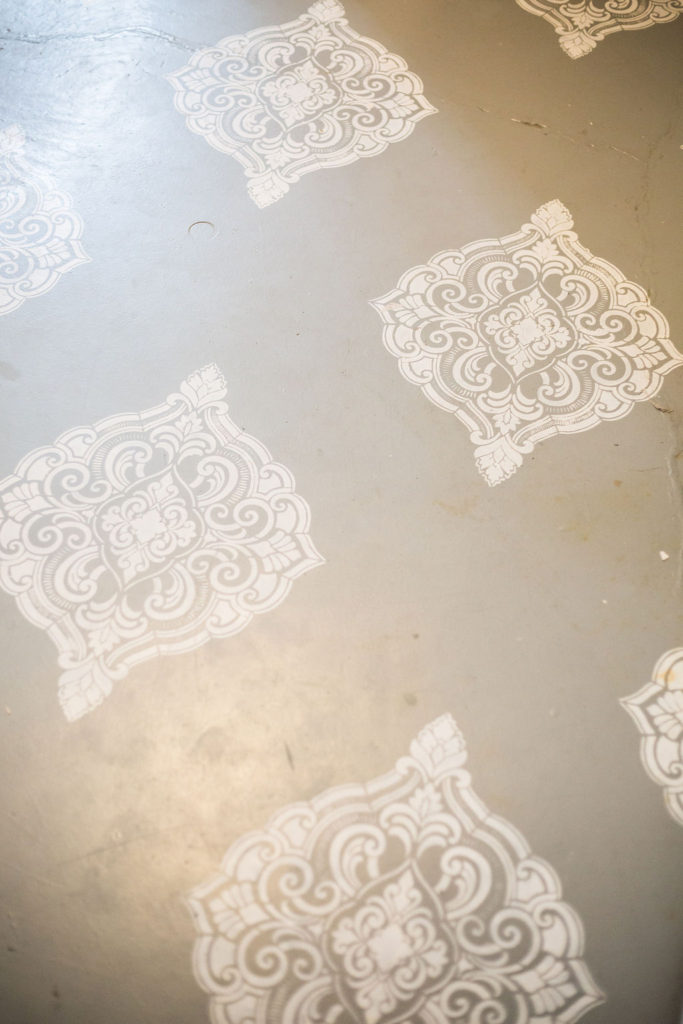
Inexpensive and stunning vintage laundry room floor update! This room made me cringe every time I walked into it, which is a lot because it’s the laundry room / basement bathroom. It’s seriously the weirdest room EVER and it’s in my house! But where there’s a will there’s a way…. Over the years it’s become quite cute! Remember the accent wall? It’s also in this room. In this post I’m going to show you how I painted and stenciled the concrete floor in my ugly laundry room and it turned out better than I envisioned!

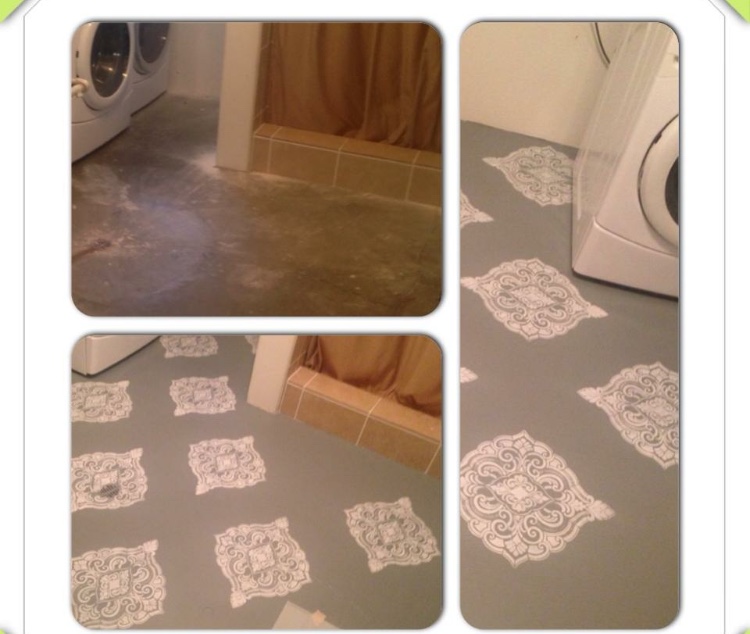
In the bottom picture, upper left corner, you can see the before concrete floor. So bad, right! I had visited a boutique that had a stenciled floor that was to die for! I was perfect for my ugly floor. I had time one weekend to knock out the project so I went supply hunting in local stores and found what I needed at Joann’s Craft Store and Lowes. See the supply list below that are hyperlinked so you can purchase the same or similar materials that I used. You can tell from my other posts that I LOVE neutral colors. Naturally, I wanted something clean looking so I chose white and gray.

Supply list:
- Mop, rags, soap water
- Valspar Light Gray Gloss Interior/Exterior Porch and Floor Paint
- FolkArt Home Decor 21.68”x17.68” Laser Cut Wall Stencil-Ornate Damask
- Painters tape
- Martha Stewart Crafts® Stencil Brush Set
First, clean the heck out of the floor. You want to make sure there’s nothing laying on the floor that will stick in your paint.
Next, I taped off the walls, toilet, shower tile, etc. Then I put the gray coat of paint down. It took no time at all!

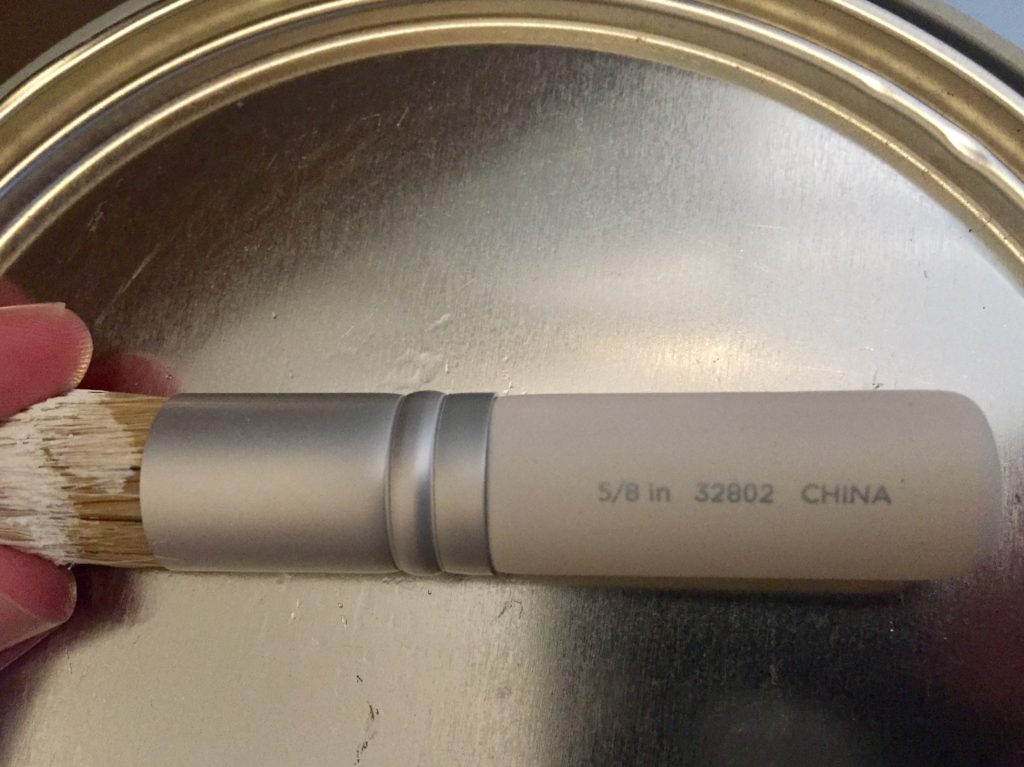
I searched online for stencils and was looking for something a little more basic, but I didn’t want to wait for it to ship! So I shopped locally and found this one at Joann’s craft store for $8 along with my brushes and used a coupon that I had for 40% off. (Hyperlinks are available to purchase supplies in the supply list.) The stencil had a lot of detail and was kind of intimidating but stenciled really easily. You can make it look more faded by really dabbing off your paintbrush onto a paper towel first. I used the 5/8″ brush in the Martha Stewart Paint Brush Set and saved the others for another craft. The brushes are small and easy to hold and work with in the small detail of the stencil I used.


All done! Do you like it? I love the pattern and colors! I painted this floor three years ago and it looks like new! There is a lot of traffic through here plus this is my teenage son’s main bathroom. It’s held up through water and feet walking all over it. It’s held up perfectly! I hope you enjoy and check out some other posts while you’re visiting my blog!
Thanks, Natalie
Tags: cottagestyle, diy, diy home decor, farmhouse, farmhouse decor, farmhouse style, fixer upper, frenchcountry, frenchfarmhouse, home decor, lifestyle blogger, modern farmhouse, vintage, vintage decor, vintage farmhouse, vintage style
Leave a Reply